 |
| Rim scratch line |
It is hard to totally avoid such scratching to your precious bicycle as we could not control what is on the terrain. To prevent further damage, it is neccessary to remove the brake pad and do a cleaning.
1. The tools required are the standard household DIY tools. Before removing the brake pad, do take a picture so that you know the alignment of it when it fix it back. Arrow indicates the direction of the wheel rotation. Do note there is a slight tilt. 1mm gap for pad-to-rim at front and 2mm gap at the other end of pad. This is to prevent squeak.
 |
| Brake pad alignment to wheel |
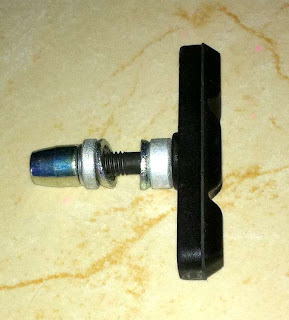
2. Using a allen key, loosen the bolt and the whole assembly of washers and spacers. You can take out the brake pad and check which culprit has caused the scratching to your rim.
There might be some metal/rocky debris stuck inside the pad. Remove them and if it is too deep, use a pen-knife and cut a portion of the rubber pad. You should see something like below after the cleaning.
If the brake pad pattern is worn out, you can buy a replacement pad. Brands like Avid, Swissstop, Clarks, Tektro are common replacement pad brands with price ranges from $5 to 30.
 |
| Brake pad after cleaning. |
3. Now you can put the assembly back where it belongs. It is a bit tricky on getting the right alignment, you may have to exercise a bit of patience here. Anyway, do take note there is a toe-in gap for the pad surface to rim surface.
 |
| Washers and spacers of brake pad |
4. Tighten the whole assembly with the allen key. You should ensure the right and left side has about the same gap, else the breaking will be uneven. There you go! No more scratching... Now, will someone please help scratch my back..
 |
| Back to original |
Thanks. Simple and useful :)
ReplyDeleteVery helpful tips for cleaning the brake pad.Thank you for sharing.
ReplyDelete